Clean all the leaves Map Overview: All 3 Maps & Every Zone
The House (11 zones), The Mansion (8 zones), The Gas Station (9 zones) — zone counts, waves, vent positions, difficulty settings, and ending triggers.
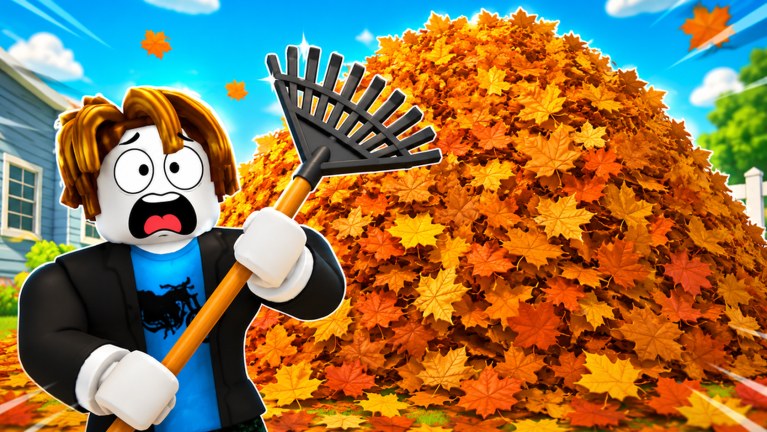
Three maps, three yard fantasies
Clean all the leaves! released 21 Jul 2026 with The House as the starting map. Two more maps have shipped since: The Mansion (after you finish The House once) and The Gas Station (added late August 2026 after the Mansion update). A Space Base dome expansion arrived September 2026. Each map has its own zone list, wave counts, ending trigger, and difficulty tiers. Source: Clean all the leaves! Guide wiki — Maps page (read 2026-09-03).
Difficulty settings
| Difficulty | Timer | Notes |
|---|---|---|
| Easy | 90 minutes | Seen in ViewSIM (Aug 18) and VendoPlus (Aug 14) clears |
| Medium | Between Easy and Hard | Difficulty menu shown in Gamer Chad’s videos |
| Hard | Not read on camera; a Mansion Hard clear took 15:12 | Gamer Chad (Aug 30) |
| Impossible | 20 minutes | Gamer Chad (Aug 22), mrsoft solo clear (Aug 19) |
Harder difficulties pay more gems per zone; leaf count and zone order do not change. The Space Base September 2026 expansion adds its own environment with low-gravity leaf behavior — see the Space Base guide.
1. The House (starting map)
Unlock: Available from the start. Ending: Basement exit vent → surveillance-room cutscene (the SECRET ENDING badge).
| Zone | Waves | What to know |
|---|---|---|
| Porch | 1 | Smallest zone; clearing it first gives the first cash boost. |
| Shed | 1 | Tool shop (rake, blower). The red button on the counter next to the green leaf bag opens the garage. |
| Garage | 1 | Opens with the shed button. Home of the garage special leaf (13 gems in one recording). |
| Front Yard | 1 | Biggest early zone; 100% here unlocks the Rooftop ladder. |
| Court | 1 | Basketball court: the Swish 3 Times in a Row quest lives here, and each basket pays 1¢. |
| Rooftop | 1 | Climb the ladder after the front yard hits 100%; blow the leaves down into a yard vent. |
| Backyard | 1 | Unlocks after the rooftop; close the doors so leaves stay put. |
| Pool | 2 | A vent sits in the pool and pays 2¢ per leaf; the zone refills once after you clear it. |
| Maze path | 2 | Short hedge pathway behind the pool; must be cleared twice. |
| Farm | 2 | Pumpkins block the blower; Santa leaf spawns here; Duck Bot part 1 on the bench. |
| Basement | 2 | No collection vent. Pile leaves by the stairs and burn them with a Molotov, or hand-pick. The exit vent opens after wave 2. |
Total: 11 zones. Ending path: clear every zone → basement wave 2 → exit vent → surveillance-room cutscene.
2. The Mansion (after finishing The House)
Unlock: Finish The House once. Ending: Walk the hedge maze to the exit after every zone is clear.
| Zone | Waves | What to know |
|---|---|---|
| Porch | 1 | Opening zone; completing it paid 9 gems in a recording on harder difficulty. |
| Alley | 1 | Narrow side zone next to the porch; trash cans nearby. |
| Front court | 1 | Opening area with the first vent; the leaf blower is $24 here in one recording (Aug 29). |
| Basketball courts | 1 | Two courts; the second one gates the pool. |
| Tennis court | 1 | Duck Bot part 2 was moved here in the Aug 30 fix (previously on the pool-side sofa). |
| Pool | 1 | Freeze leaf (snowball) and Molotov on sale nearby; Leaf Mower costs $224–$225. |
| Relaxation court | 1 | Small zone near the end. |
| Maze | — | Not a cleaning zone: it is the walk to the exit once the map is clear. |
Total: 8 zones (7 cleaning + the exit maze). Ending path: clear all zones → walk the maze → exit.
3. The Gas Station (after finishing The Mansion)
Unlock: Finish The Mansion. Ending: Clearing the back lot triggers the UFO abduction cutscene.
| Zone | Waves | What to know |
|---|---|---|
| Bus stop | 1 | Tiny starter zone. |
| Street | 1 | Open road; first cash boost (+20%) on completion. |
| Gas station entrance | 1 | Blow the leaves off the billboard (climb the ladder) before the doors open. |
| Store interior | 2 | Small room, two waves. |
| Staff room | 2 | Unlocks with the restroom. |
| Restroom | 2 | Blow everything into one corner. |
| Storage room | 3 | Three waves in a small room. |
| Roof | 3 | Vent in the middle of the roof. |
| Back lot | 3 | Vent pays 3¢ per leaf; Duck Bot part 3 behind the rubble by the fence; finishing it starts the ending. |
Total: 9 zones. Ending path: clear all zones → back lot 100% → UFO abduction cutscene.
Duck Bot parts (3 total, free helper bot)
The free Duck Bot has 3 collectible parts. Collecting all 3 unlocks the Duck Bot helper. Part locations:
| Part | Location | Notes |
|---|---|---|
| Part 1 | Farm — on the bench | The House map |
| Part 2 | Tennis court | The Mansion — moved here in the Aug 30 fix (was pool-side sofa) |
| Part 3 | Back lot — behind the rubble by the fence | The Gas Station |
Source: Gamer Chad, citing the official Discord (Aug 30 fix confirmation). See the Duck Bot guide for the full bot breakdown.
Zone order and wave logic
Zone order is what recordings show unlocking one after another. A zone with 2 or 3 waves refills that many times before its 100% sticks — clear once, it refills; clear again, it may refill again depending on zone type. Per-map walkthroughs: House walkthrough, Mansion guide, Gas Station guide.
Map connections and routing
- Sell points are your economic checkpoints — learn them before committing to deep clears.
- Vents appear in multiple zones and pay per leaf (Pool: 2¢, Back lot: 3¢). Use them to avoid long walks.
- Garage button (The House Shed) opens the garage — a required progression step, not optional.
- Tool prices vary by map — the leaf blower is $24 at The Mansion front court (Aug 29 recording) and $224–$225 for the Leaf Mower at the pool.
After patches
Map collision, vent payouts, and zone order can shift. The 12 Aug 2026 universe update and late Aug 2026 Gas Station launch both changed zone availability. After future patches, re-walk landmarks and skim Updates Hub and Changelog.
Next reads
- Area Unlocks — when specific zones open.
- Secret Ending — what 100% on each map is for.
- Space Base guide — the September 2026 dome expansion.
- Co-op Tips — how to split zones across a full lobby.
Frequently Asked Questions
Quick answers about Clean all the leaves and this wiki.
How many maps does Clean all the leaves! have?
Three confirmed maps: The House (11 zones, the starting map), The Mansion (8 zones, unlocks after finishing The House), and The Gas Station (9 zones, added late August 2026). A Space Base dome expansion arrived September 2026.
What are the zones in The House?
Porch, Shed, Garage, Front Yard, Court, Rooftop, Backyard, Pool, Maze path, Farm, and Basement — 11 zones total ending with the basement exit vent.
How does the Mansion ending work?
Clear all 8 zones (7 cleaning + the exit maze), then walk the hedge maze to the exit. No UFO — that is The Gas Station ending.
Where are the 3 Duck Bot parts?
Part 1: Farm bench (The House). Part 2: Tennis court (The Mansion — moved from pool-side sofa in Aug 30 fix). Part 3: Back lot rubble (The Gas Station).
What difficulty should I start with?
Easy (90 minutes) is the standard starting difficulty. Hard pays more gems but a Mansion Hard clear took 15:12. Impossible (20 minutes) is a challenge mode.
Does the Space Base have zones too?
The Space Base is a dome environment with low-gravity leaf behavior, added September 2026. See the [Space Base guide](/guides/space-base/) for the dome layout and strategy.